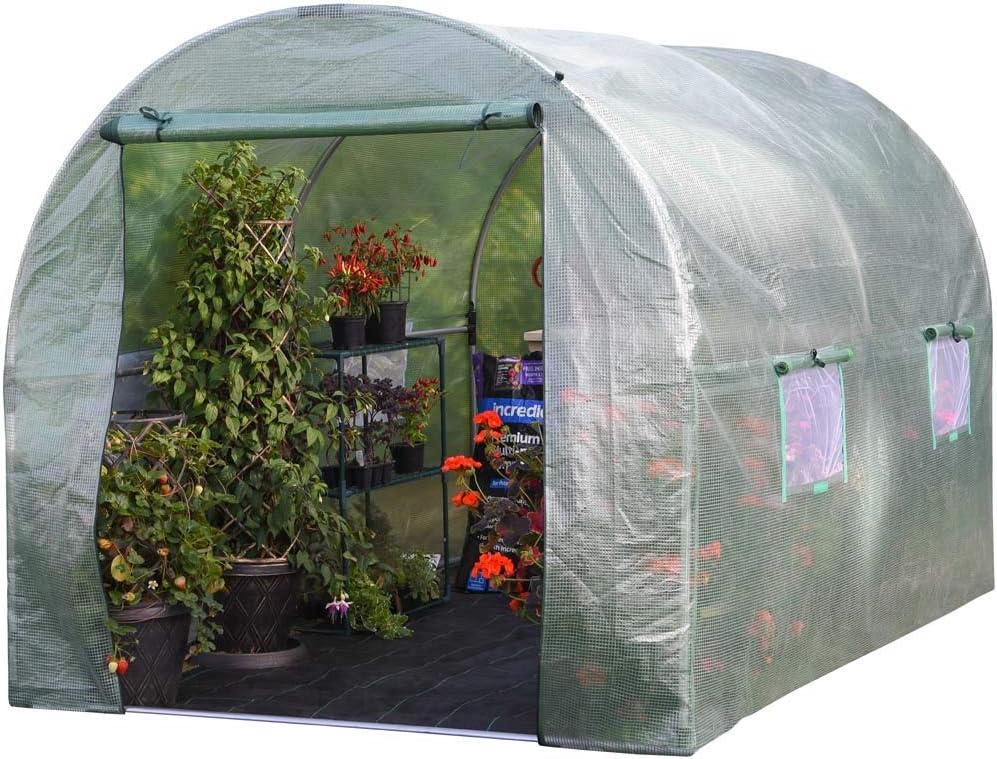
Garden Grow Polytunnel 3M x2M Powder Coated Steel Frame, Walk In Greenhouse, Double Zipped Door & Windows (3 x 2 Polytunnel)
FREE Shipping
Garden Grow Polytunnel 3M x2M Powder Coated Steel Frame, Walk In Greenhouse, Double Zipped Door & Windows (3 x 2 Polytunnel)
- Brand: Unbranded

Description
All the parts are very high quality, giving you a polytunnel that will stand the test of time. And although it will take two people around two days to build it, the instructions and videos are very good. Having a door you can open, to let much needed air into the polytunnel is vital. Two doors, one at each end, is even better. Because this will allow you to achieve air circulation. The way it works is that you buy additional arches and a bigger cover. This is a good solution if you are not sure about the size you need, as it gives you the option to make it bigger, should you need to. Location I would always recommend buying the best quality for the price you can afford, even if that means shopping around a bit.
Price For Money | Extreme Strength | Superior Construct…This Tunnel Has More Internal Bracing Than All Others. More Bracing Method Greater Strength & Greater Max-Flex Tolerance Against Wind Stresses. 3m x 2m Model Has 2 Corner Bracing Bars, 4m x 2m & 6m x 3m Models Have 4 Corner Bracing Bars. “Many Lighter Braced Structures Have No Diagonal Bracers Or Full Set Of Ground Bars”. A well ventilated polytunnel will keep moisture levels in control, but also ensure the polytunnel does not get too hot.Old sash weights –If you can find a sash window company that does replacements then you can duct tape or tie them to the corner and centre uprights of your frame. This is a remarkably good and cheap way of reducing costs: Sash weights work as superb ballast for a polytunnel HEAVY DUTY POLYTUNNEL COVER: As well as superior framework our covers are 140gsm and the UPVC cover will let ample UV light in whilst also being expected to last a number of season in the British climate. There is ample skirt material around the bottom of the polytunnel cover to be dug into the ground for additional stability. If the location of your garden or allotment polytunnel is especially exposed, you can look into reinforcing your polytunnel with wood, even if the polytunnel itself does not come with this feature.
However, during summer, a polytunnel can heat up quite a bit during the day. And while many plants, such as tomatoes, love it warm, if it gets too hot, they might not do very well. If you’re shopping around for a durable plastic greenhouse, you’ll find that our garden polytunnels range goes up to 14ft in width. Each product in this selection includes a steel framework made with large diameter steel hoops, foundation tubes, ridge, and corner stabilisers. It also includes a Thermal Anti Drip polythene cover, offering added protection. Aside from this feature, essentially everything else is the same between the VonHaus and VOUNOT polytunnel, apart from one essential detail – the price. Given the fact that both polytunnels measure 2 metres in height, 3 metres in length and 2 metres in width, both have the same strong and sturdy frame, and both have ventilation windows, you would think that they would cost the same. However, VOUNOT is considerably cheaper than its competitor VonHaus, which is the very reason it wins the top spot on this list. Our 3x2m polytunnel will make a suitable alternative to a solid structure to house birds during the Avian Flu outbreak. Our tunnel allows adequate light and ventilation and will help offer protection from wild birds that may be carrying the disease. Garden Point Green Polytunnel – bit of a tear on the corner – is there anything duct tape won’t fix? 😀In terms of assembly it’s just like any other polytunnel, loosely tighten your bolts, get a hand with the canvas – don’t do this on a windy day and if you do please send me the video for entertainment 😀 Then once the canvas reasonably in place it’s time to then tighten it all up and slide the canvas around with minor adjustments. Unfortunately, it is pretty difficult (scratch that – impossible) to have a polytunnel delivered to your house fully constructed and ready to go. This means that self-assembly is required with a polytunnel, but I know how it is – life is busy and not everyone has hours to spare to put their brand spanking new polytunnel together. Likewise, not all of us are blessed with DIY skills, so ideally your new polytunnel will be fairly easy to put together. However, if you buy the BIRCHTREE as I have tested then they all rivet together without the need for any drills at all! They just snap together: BIRCHTREE Polytunnel just snaps together You could also consider growing a hedge to break the wind, if the wind tends to come from one direction. We were relieved to find that constructing the polytunnel was relatively straightforward. There were a few bits that looked easier than they were, but also quite a few things we were dreading (like putting on the cover) that actually turned out to be pretty easy. Ventilation is one of the most important things when it comes to a polytunnel. Because of the way a polytunnel works, moister build up is a common occurrence.
While the First Tunnels polytunnel is not the cheapest, it is well worth the money. You will get the polytunnel that suits your allotment and your growing needs. Make sure you don’t do the frame sides up tight, slide the canvas over the hoops first so there’s more play – this is going to almost certainly save you from damaging the cover as a result of it being too tight to pull over. There area few key factors in ensuring your polytunnel stays still, even in a serious gale there shouldn’t be much reason to fear, though if you’ve already got one you do question at home, I hope the polytunnel is holding up 😀 – still, let’s look at how to fix one in properly and make sure it never blows away – and if it does, your neighbouring polytunnels went long before yours! So here’s some tips to hold polytunnel down here: So it is important to buy the best quality you can for your budget. To ensure you get the best polytunnel for your needs, look out for these criteria. The materials used to make your polytunnel are also an important consideration to factor in. Firstly, it is essential that the frame of your polytunnel is sturdy, as without a frame your polytunnel will be pretty useless. This means that you should ideally be looking for a steel framework, which ideally will be galvanised or powder coated for extra protection. All in this article are at least that standard with the
You want to make sure your polytunnel has a metal frame. The best polytunnels for an allotment or garden will have a frame made of galvanised steel, which is a very strong material.
Another problem that can occur in a polytunnel is moister build up. Condensation can create the perfect environment for fungal diseases, which love damp, warm conditions.FRONT HINGED METAL DOOR. NETTED WINDOWS TO EACH SIDE. WE BELIEVE THIS IS THE STRONGEST STRUCTURE “IN IT’S CLASS” ABOVE ALL OTHERS, “ADDED DIAGONAL WALL BRACING” + FULL GROUND BAR KIT GIVES MAX FLEX TOLERANCE AGAINST WIND STRESSES. If you do not have purpose-built housing you could use a garden shed or polytunnel, as long as there is adequate light, space and ventilation.’
- Fruugo ID: 258392218-563234582
- EAN: 764486781913
-
Sold by: Fruugo