About this deal
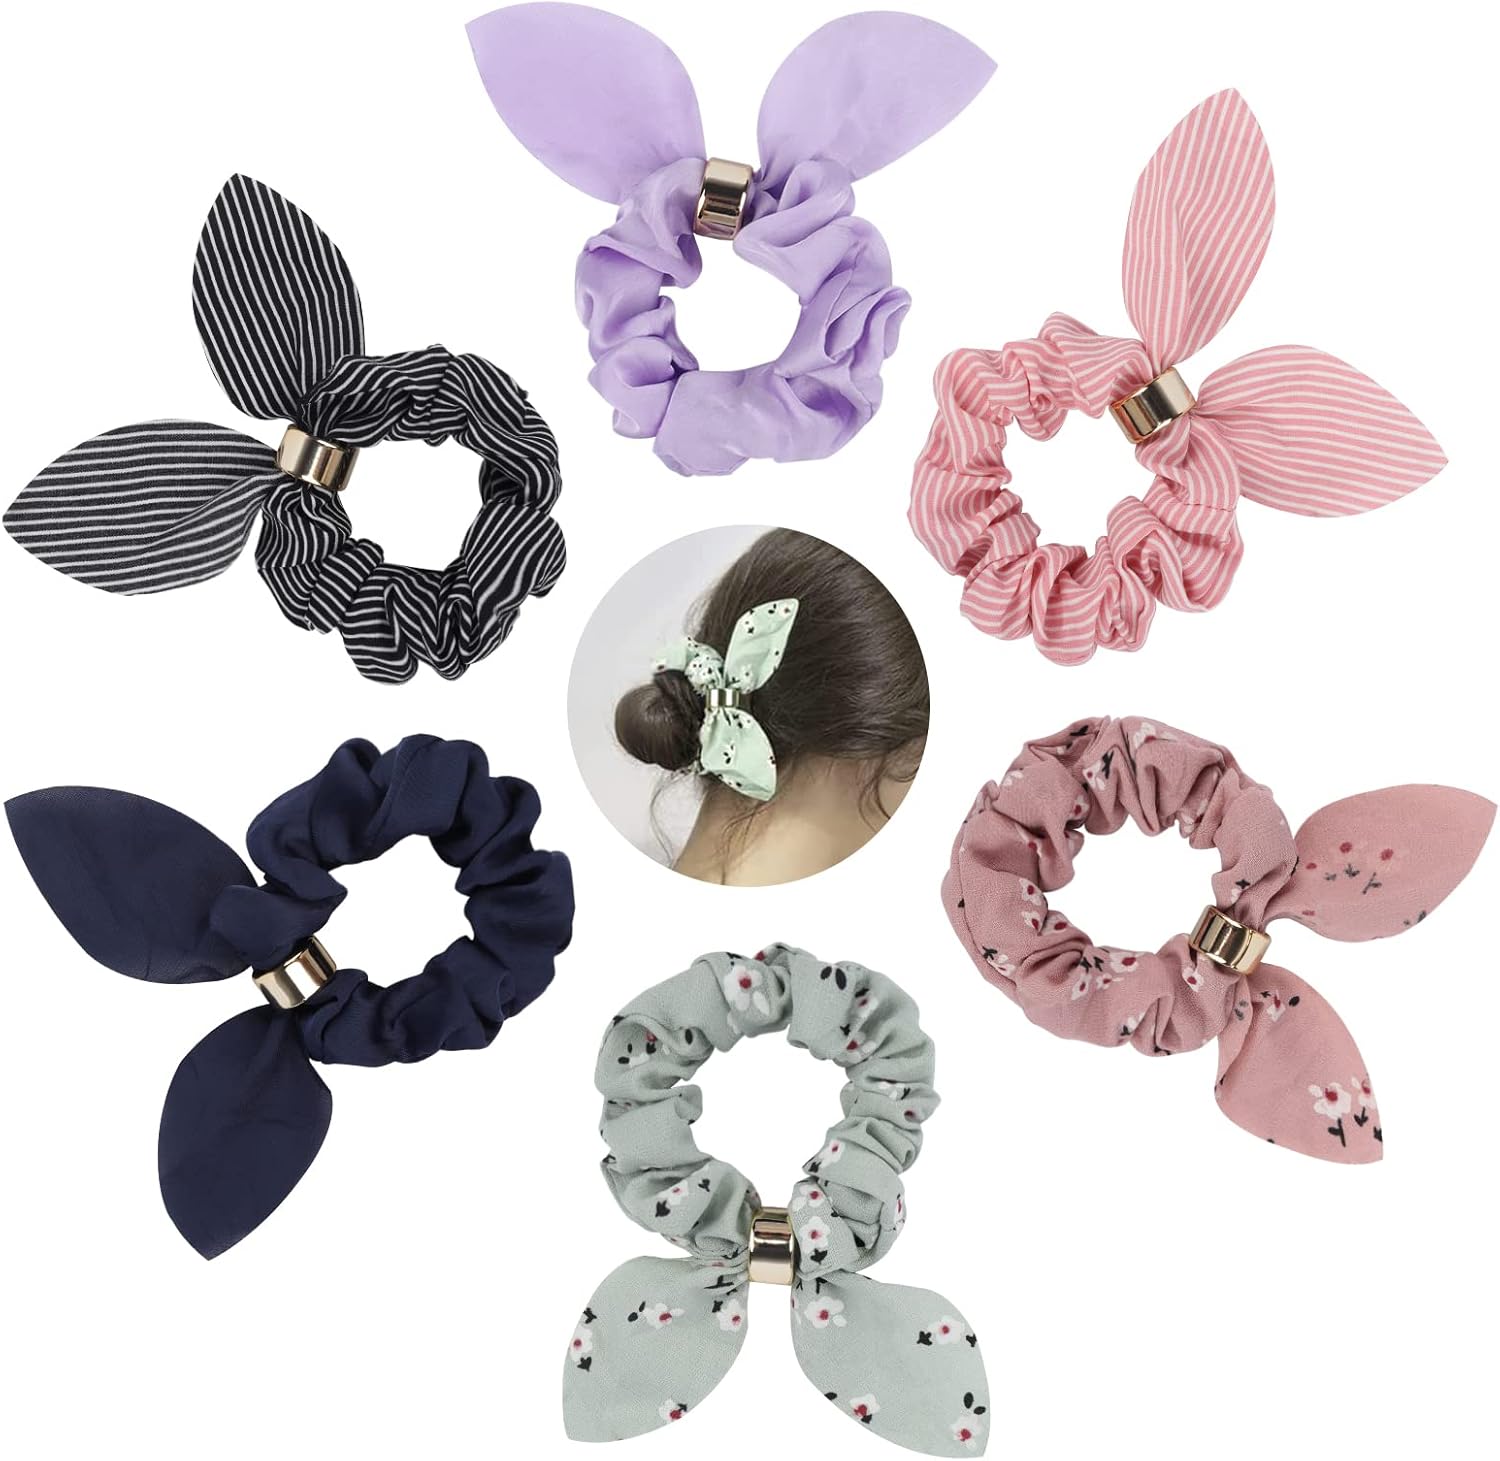
It only takes sewing an extra-long tube of fabric, and a straight stitch. So easy and what you get is a beautiful classic look! Like above with all the other scrunchies, first, make the main piece. Then it's time for the classic bow part. It's so easy! Because you'll only sew a strip of fabric: Give it a good press with the iron. Then, press the seam allowances in at the turning hole and top stitch close to the edge to close the hole. What a fun idea to make this spring! To create a diy bunny ear scrunchie, use the bunny ear scrunchie pattern piece (i.e. the one marked as 'Bunny Ear Piece'). 4 - Diy Scarf Scrunchie Pattern This is the most basic scrunchie option you can make! It's perfect for throwing your hair up in a ponytail or wearing on your wrist. Scrunchies with Short Bunny Ears
Note: I keep saying in the video that this method only uses 1 line of stitching. Sorry, that’s a mistake. I meant 2 lines. Whoops! In this tutorial, I’ll teach you how to sew a classic scrunchie. I’ll also show you how to add 3 different bow variations to your scrunchies. Step 3: Using scissors, clip the curves. (This creates a smooth outer edge when you turn the fabric right side out.) Turn the bow right side out through the remaining gap. Press if desired. Step 1: To cut out the fabric for your bow, fold your fabric in half and place the pattern pice on top with the top edge along the fold. Pin the pattern in place and then cut out the fabric – you need to do this twice so that you have two identical pieces of fabric which open out to look like this…You don’t need a lot of fabric to get started, either. Scrunchies are a great project for using small pieces of fabric from your stash. For instance, you can get about 5 scrunchies from 1 fat quarter-size piece of fabric. Materials List Sew the short ends with a 3/8 inch seam allowance. Make sure to keep the fabric flat as you sew over it. This pattern makes a bow with shorter tails. If you want a bow with long tails, you can cut a longer rectangle of fabric. I’m kind of an overachiever so I added knotted bows to them. The knot bow makes it look like you took the time to tie a pretty little scarf, when all you did was wrap that scrunchie around your ponytail. All of the cute, none of the hassle.
Once you’ve gotten the short end to meet each other, match up the edges with the right sides together. Use pins to secure the layers. Sew with a 3/8″ seam allowance. Step 4. Turn right side out. Now, turn the fabric tube right side out using a safety pin - attach it to one end and guide the safety pin through - just like you do it when threading elastic through a casing. STEP 7 – Add Elastic and Close Almost all steps can be completed with a sewing machine — there is only the tiniest bit of hand sewing required. That said, if you don’t have a sewing machine, you can easily hand-sew all of the steps. (I’ll show you how to modify this pattern into a no-sew project, too.) Scrunchies with Knots, Bows, or Tails If you don’t want to sew the opening by hand, you can sew the gap closed using a sewing machine. To do this, fold the opening closed, and secure it with pins. Using a straight stitch, sew very close to the edge of the fabric. There will be a small seam, but I don’t think you’ll notice it much while you’re wearing the scrunchie. This diy bow scrunchie pattern makes the cutest knot bow scrunchie! (But if you prefer a classic bow scrunchie, I might have a surprise for you later on.) 2 - Mini Knot Bow Scrunchie PatternFold it right sides together lengthwise and sew from each narrow end towards the middle of the strip. Leave a 3" gap in the middle for turning. Our sustainable silk printed scrunchies are the perfect addition to brighten up your outfits. Sustainably made from fabric cutoffs to help reduce our waste and available in a range of our best-selling Lisou prints. Can be worn in a bow or with the tails loose.
Step 2: Place the pattern pieces together with the right sides facing then pin around the outside. I like to give the fabric a little press with the iron at this point. Choose an all-purpose sewing thread in a color that matches your fabric. Use a hand-sewing needle to sew along the seams with a small running stitch. How to Make a No-Sew Scrunchie PRO TIP: I like to use my loop turner for this. Push the end inside the tube a few inches, then reach in with the loop turner from the far side and hook the turned-in end. Then, simply pull the loop turner out, bringing the end of the fabric with it! For the basic scrunchies and scrunchies with short and medium ears, I recommend using a stretch velvet fabric. This gives it a nice, full look. Once the tail end of the elastic is about to disappear into the scrunchie, use another safety pin to attach it to the fabric at the opening. You don't want to lose this tail or you'll have to start all over!You can use almost any type of fabric you like, from quilting cotton to crushed velvet. Here are some things to consider: If you love scrunchies, I bet you're also gonna love my scrunchie barrette tutorial! It has the gathered fabric of a scrunchie, but on a barrette base instead of a stretchy ponytail holder. Supplies
Fold the fabric in half and pin to hold in place. Sew along the pinned edge 3" (8cm)with a 1/4 inch seam allowance then stop sewing and leave a small opening about 2" (5cm) wide. If you don’t have access to a printer, here are the measurements so you can draw your own: it’s 11 6/8″ (30cm) wide, 2 6/8″ (7cm) tall in the middle, and almost 4″ (10cm) tall at the highest point. 2. Fold the bow in half, sew it & leave a gap in the middle Place elastic around your wrist or cut as measurements above. Thread the elastic through the opening in the seam and tie off with a knot. If you don't have a loop turner, you can also hook a safety pin to the end of the fabric and work the safety pin through the tube until it comes out the other side.Step 3: Sew around the outside of the fabric leaving a 1.5 cm seam allowance. Leave a gap of about 4 cm in the middle of the bow on one edge. Trim the seam allowance down to around 1 cm everywhere except the part where you left the gap (pinking shears are perfect for this).
 Great Deal